
Process Designer - Setting Up Processes
Package: BASIC
1. Managing groups and processes
In the settings item Global Settings - Process Designer, the processes are displayed by group.
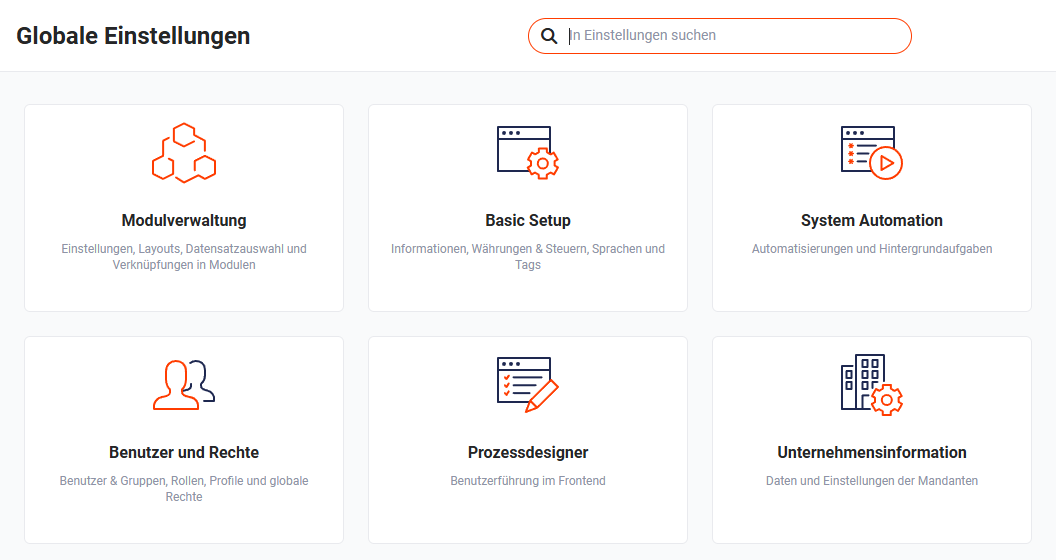 Global Settings with the “Process Designer” tile
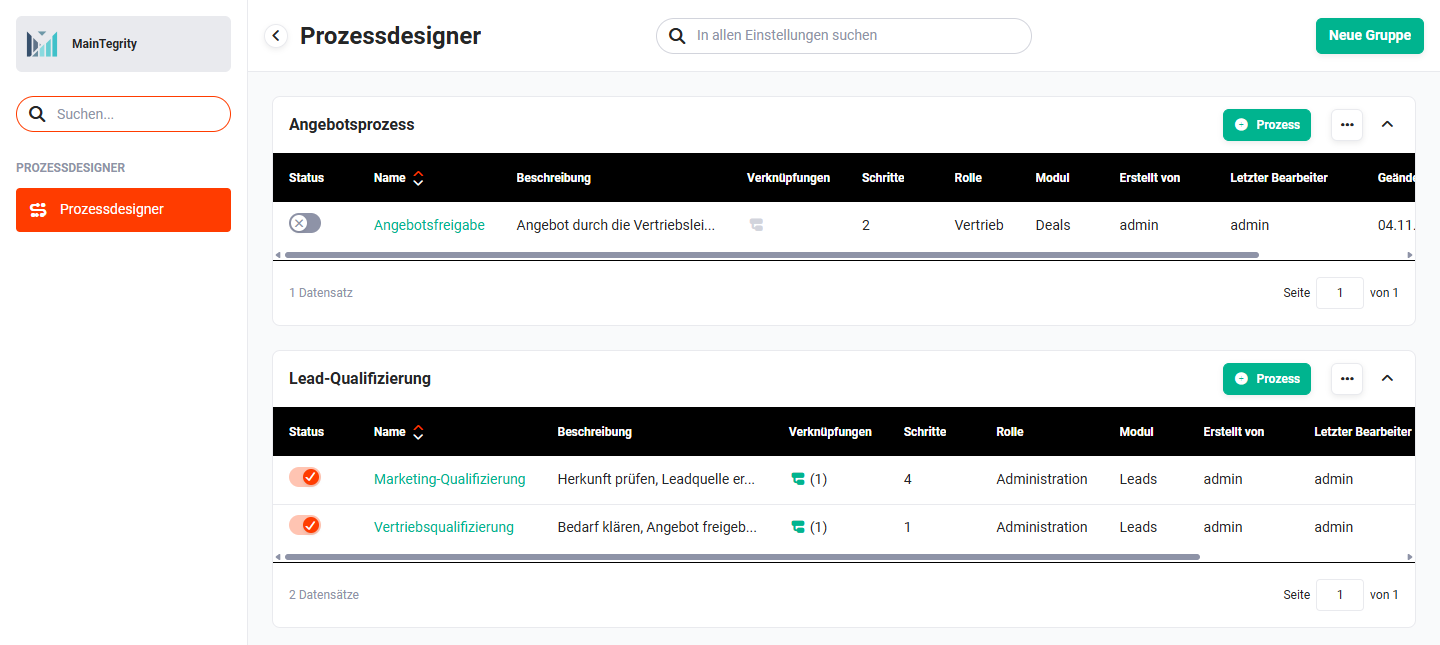 Process Designer with groups and the list of their processes
Groups combine processes that are involved in a particular workflow, e.g. Contact management or Lead qualification. Before the first process can be created, a group must exist.
- Button “New group” → opens the popup “New group”; a group only requires a Name
- Button “Process” (in the header of a group) → opens the popup “New process”, see Creating a process
- Actions icon “three dots” (in the header of a group) → flyout menu with the actions:
- Edit → change the name of the group
- Deactivate all → deactivate all processes of the group
- Delete → delete the group including all contained processes
When a group is deleted, all processes of this group are deleted as well. Processes that should be retained should first be moved to another group via the Group field in the process settings. If the processes should only be unused temporarily, use the Deactivate all action.
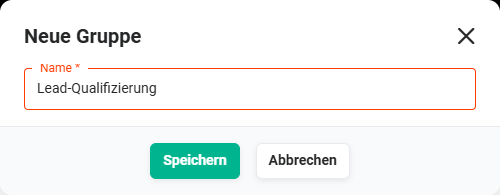 Popup “New group” with the “Name” field
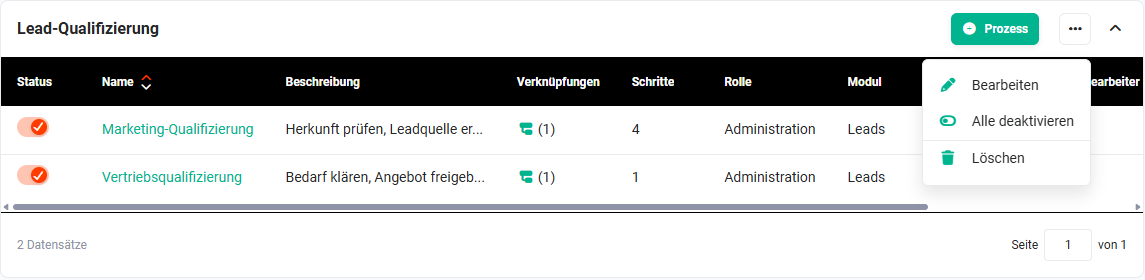 Flyout menu of a group with the actions “Edit”, “Deactivate all” and “Delete”
The processes of a group are displayed in a list with the columns Status, Name, Description, Links, Steps, Role, Module, Created by, Last editor and Modified. The process is activated or deactivated via the toggle in the Status column.
Process Designer with groups and the list of their processes
1.1. Creating a process
Popup “New process”:
- Name * → name of the process
- Module * → module for whose records the process applies
- Role * → role for which the process applies. All users of this role are automatically shown the process in the record. Users of superordinate roles are not automatically suggested it, but can select it manually and thereby view the processes and progress of their employees.
- Description → optional description
After saving, the process editor opens.
New processes are initially inactive. They are only shown in the record once the Process active toggle is switched on.
Via the Switch process window, superiors can also select processes of subordinate roles and thereby track the progress of their employees (see Process Designer - Processes in the record).
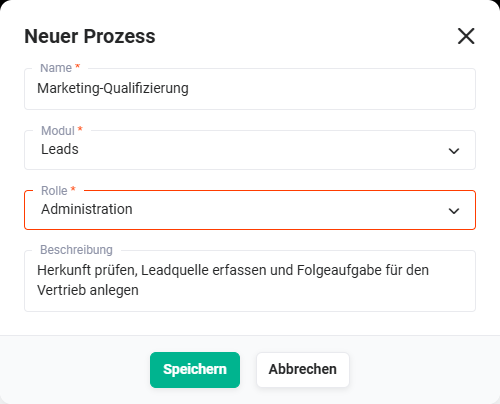 Popup “New process” with the fields “Name”, “Module”, “Role” and “Description”
1.2. Configuring a process
In the editor, the steps are displayed one below the other in a fixed order; the display grows downwards with each inserted step. A new step is inserted via the “Plus” icon between two steps. When hovering over a step, the actions icons “Edit” (“pencil” icon) and “Delete” (“trash can” icon) are displayed.
Steps cannot be moved afterwards. A new step can only be inserted once the previous one is fully configured.
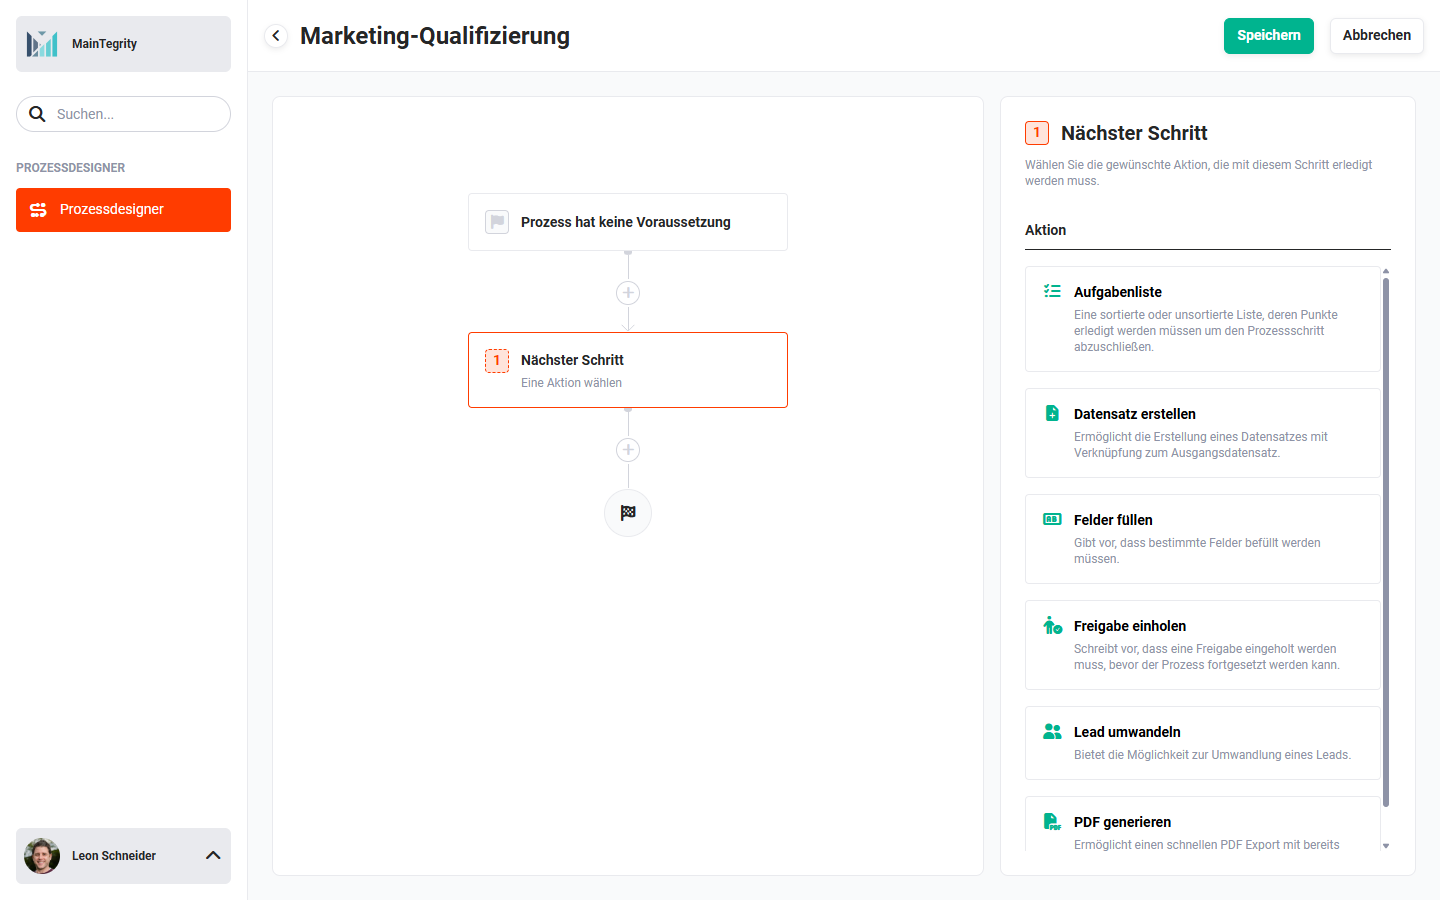 Editor of a process: selection of the step type for a newly inserted step
1.3. Process settings
If no step is selected, the Settings sidebar shows the settings of the entire process:
- Name * → name of the process
- Group → group to which the process belongs; a process is moved to another group via this selection
- Module → is defined when creating and cannot be changed
- Role → role for which the process applies
- Description
- Notification when completed → If the checkbox is activated, a notification is sent when the process is completed. The Responsible of the record, Users, Groups or Roles can be selected as recipients.
- Toggle “Process active” → activates or deactivates the process
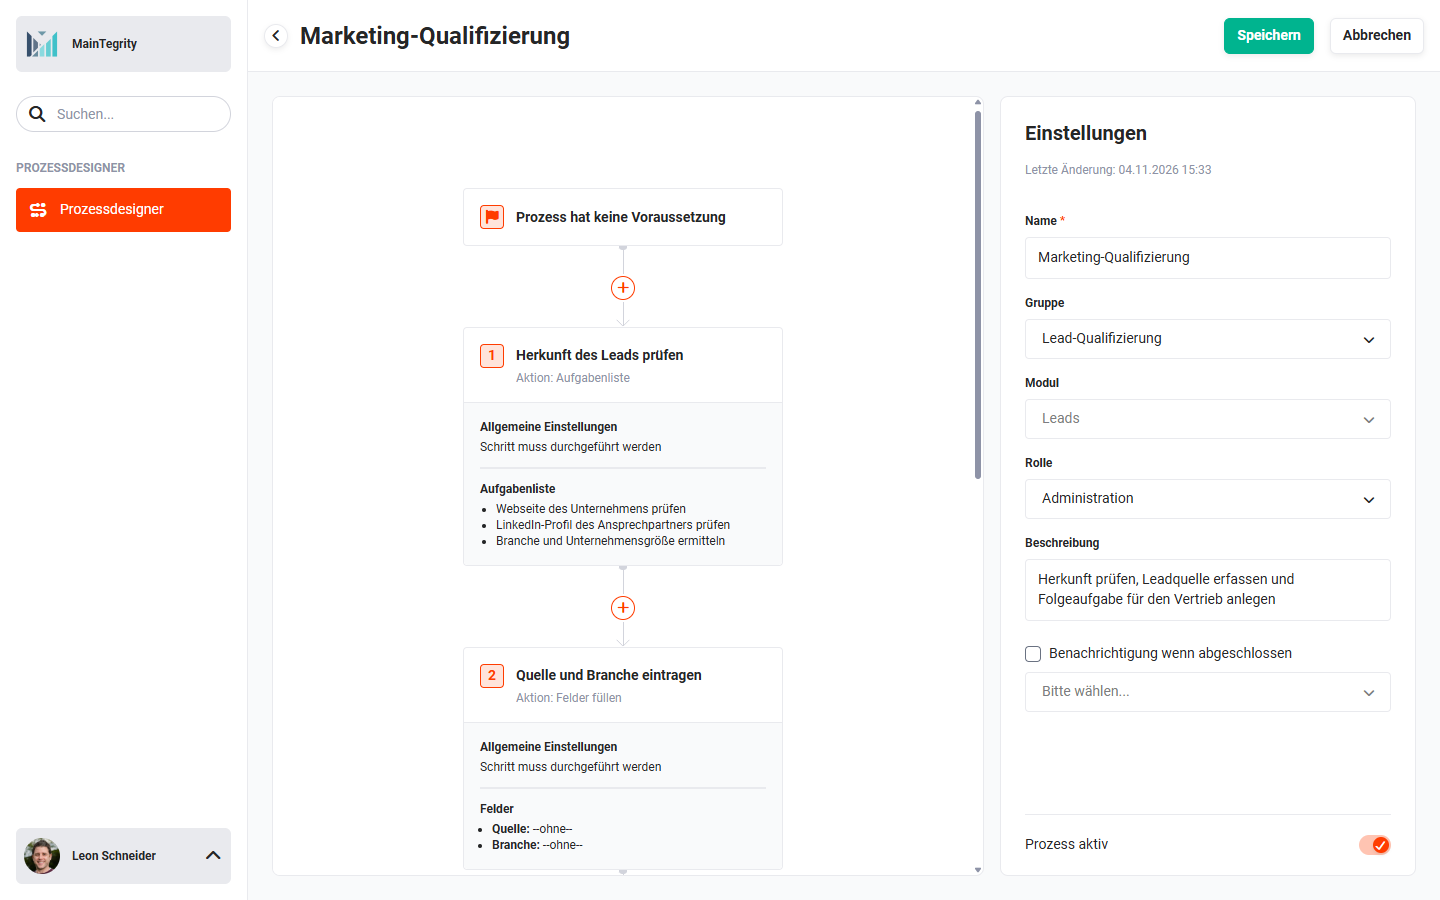 “Settings” sidebar with the settings of the entire process
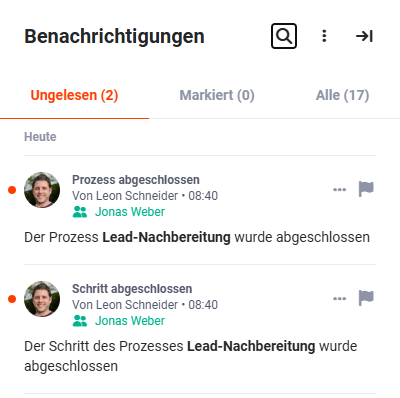 Notifications “Process completed” and “Step completed” in the notification list
1.4. Start step – Show process when …
The start step cannot be deleted. The Condition field defines when the process is available in the record:
- None → The process is available in all records of the module, including existing ones.
- Condition → The process is only available once the conditions are met. Conditions and condition groups are configured as in the rest of the system and linked with and / or. If the prerequisite process remains inactive, the process is never available in the record.
- Another process → The process is only available once another process is completed. All processes of the same module are available for selection, including inactive ones. In this way, an entire process chain can be built up before the processes are activated.
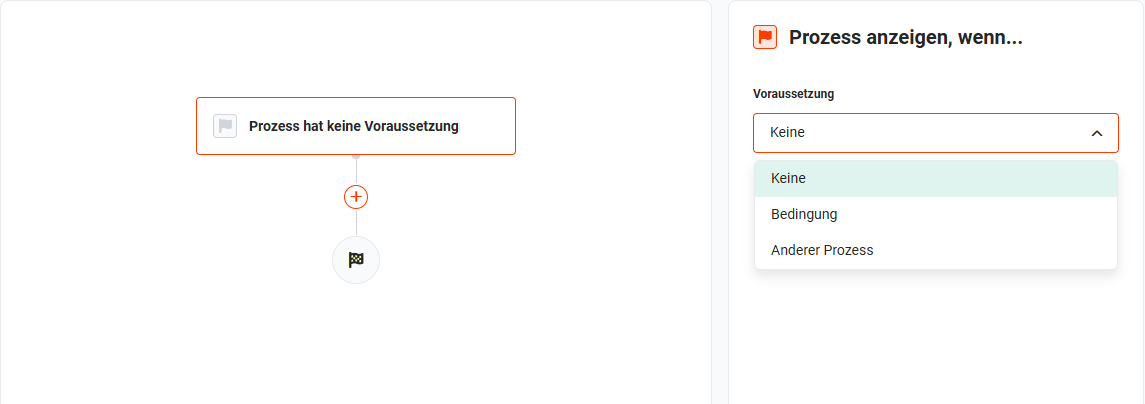 Start step “Show process when...” with the condition “Condition”
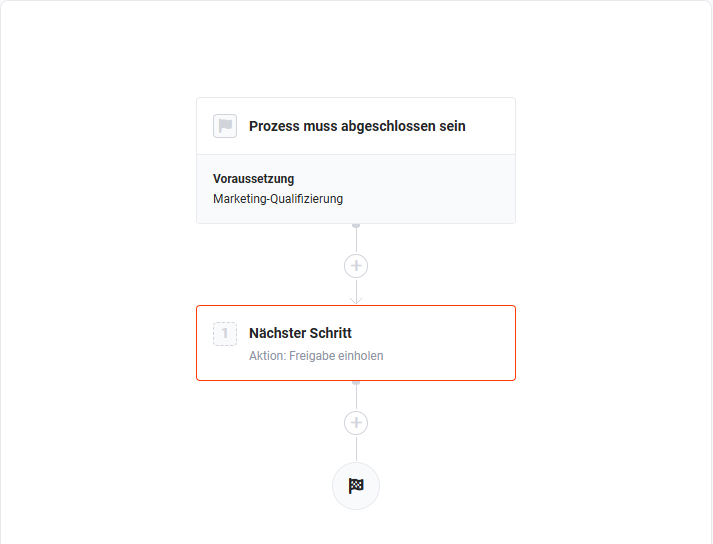 Start step with the condition “Another process” and selection of the preceding process
With the condition Another process, several processes can be chained one after the other, e.g. first the marketing qualification, then the sales qualification. Once the first process is completed, the next one is displayed automatically.
1.5. General settings of a step
After inserting a step, the action (the step type) is chosen first, see Step types. Afterwards, the following fields are available in the General settings section:
- Name * → is displayed to the user in the record
- Hint text → additional note for the user who processes the step
- Optional step → The user does not have to perform the step, but can skip it (not for the step types Obtain approval and Convert lead). For how skipped steps are caught up on in the record, see Process Designer - Processes in the record.
- Notification when completed → If the checkbox is activated, a notification with the name of the completed step is sent when the step is completed. As with the process, the Responsible of the record, Users, Groups or Roles can be selected as recipients. In the record, the step is marked with a bell icon.
- Activate due date → If the checkbox is activated, the due date is defined
- via a date field of the record (Fields section, e.g. created), or
- Custom via the workspace: starting from the start of the process, from the completion of the previous step or from the current date, also with calculations and with access to the date fields of all involved modules including the reference modules (e.g. “Completion of the previous step + 7 days”).
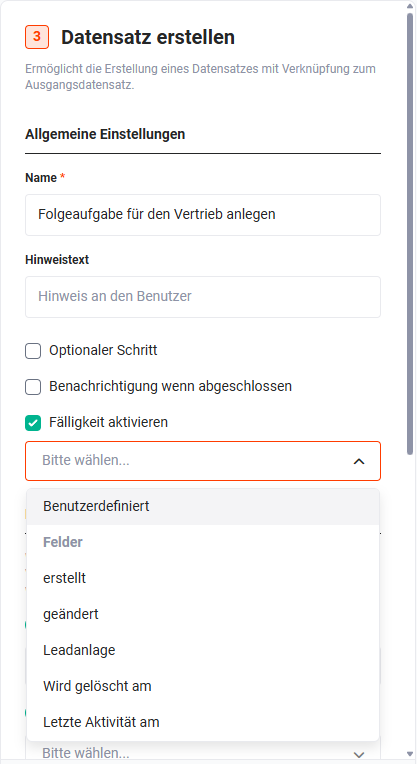 General settings of a step with activated due date
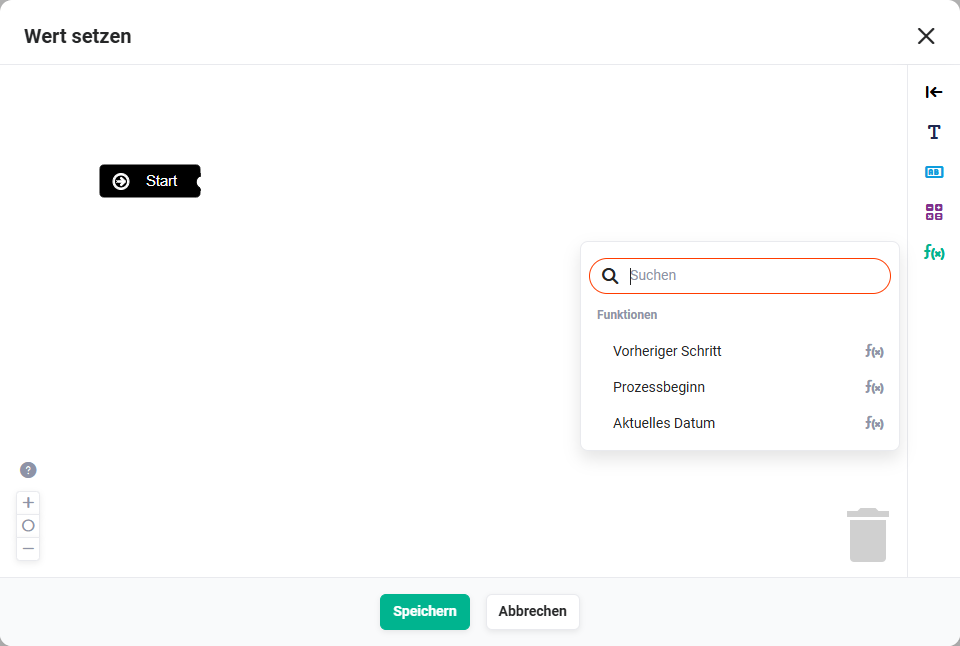 “Set value” workspace for the custom due date with the functions “Previous step”, “Process start” and “Current date”
1.6. Step types
| Step type | Configuration | In the record |
|---|---|---|
| Task list | A sorted or unsorted list whose items must be completed. Tasks are added via “Add”, and the order can be changed via drag-and-drop. If the toggle “Sort list” is active, the tasks must be checked off in the defined order. | The user checks off the tasks. |
| Create record | Allows the creation of a record with a link to the source record. Either an Action (e.g. New task, New email, New appointment) or a Link with creation option (e.g. Tasks, Appointments, Documents) is selected. The associated field mappings are applied. In the Additional fields section, the mandatory fields of the target module are displayed; their values can be overwritten and further fields can be supplemented with default values, also via the workspace. | The quick capture opens, pre-filled with the configured values. After saving, the new record is linked in the step. |
| Fill fields | Specifies that certain fields must be filled. Configuration as with Create record, but always refers to the current record. Picklists are automatically pre-filled with --none--. | The user fills the specified fields. For text fields, an already filled value of the record takes precedence over the specification. For picklists, the specification is always displayed and applied on saving. Mandatory fields and variable mandatory fields apply as usual. |
| Obtain approval | Specifies that an approval must be obtained before the process can be continued. The field Authorized to approve * defines who may grant the approval. By default, the templates of the subsequent Generate PDF steps are locked until approval. Locked templates are also not offered in the manual PDF export until approval. In the field Locked templates (optional), further templates can be locked, e.g. all quote templates of a deal. | The user requests the approval via “Send request”. The authorized user receives the notification Approval request and grants the approval in the record via “Grant approval”. If no other template is available, a note appears that the template is locked until approval. |
| Convert lead | Offers the option of converting a lead (only in the Leads module). | The lead conversion is started. |
| Generate PDF | Allows a quick PDF export with already preconfigured settings: Template *, Language and Digital signature (No, Via DocuSign or Via DocuSeal; an active connection is required for this). Under Further settings, Export with reference, Send as email and Overwritable template are available. | The PDF is created with the configured settings via “Export”. If Send as email is activated, the recipients are selected from the linked records in the Select email addresses window, e.g. contact and organization. The email window then opens with the PDF as an attachment. |
For picklists, the step's specification overwrites an already existing value in the record, including the specification --none--. For this reason, enter the desired value as a specification for each picklist, or only include the field in the step if it is usually still empty in the record.
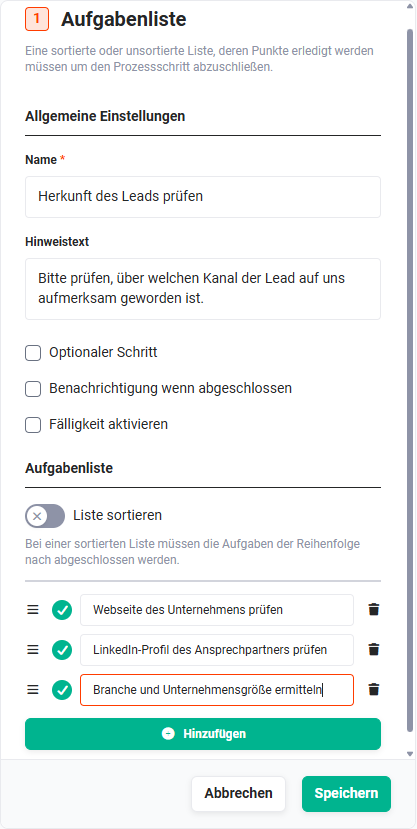 Step type “Task list” with tasks and the toggle “Sort list”
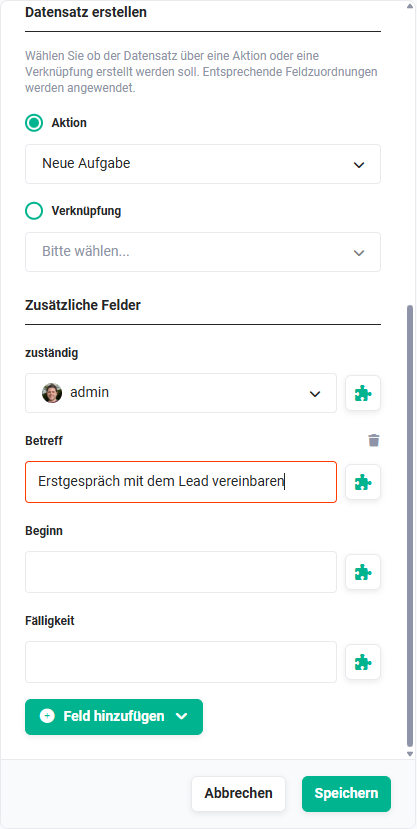 Step type “Create record” with selection “Action” / “Link” and the “Additional fields” section
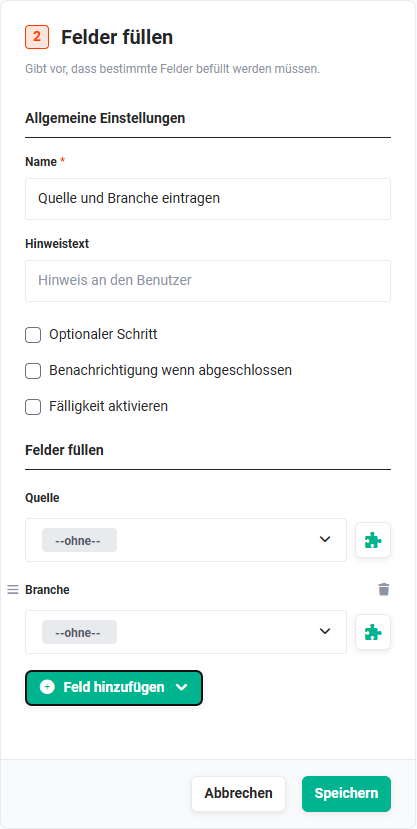 Step type “Fill fields” with the specified fields
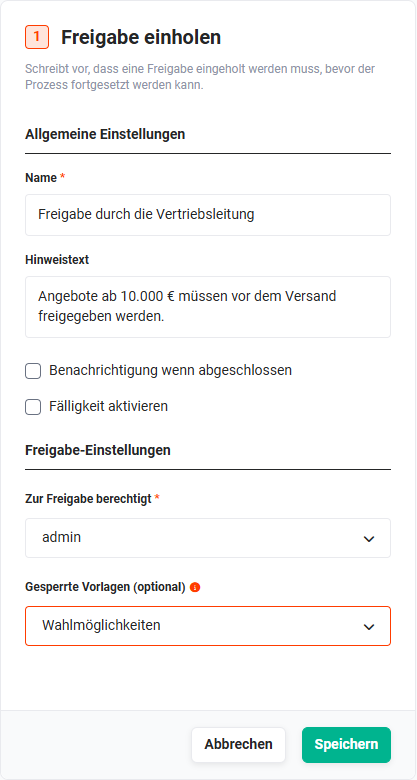 Step type “Obtain approval” with the fields “Authorized to approve” and “Locked templates (optional)”
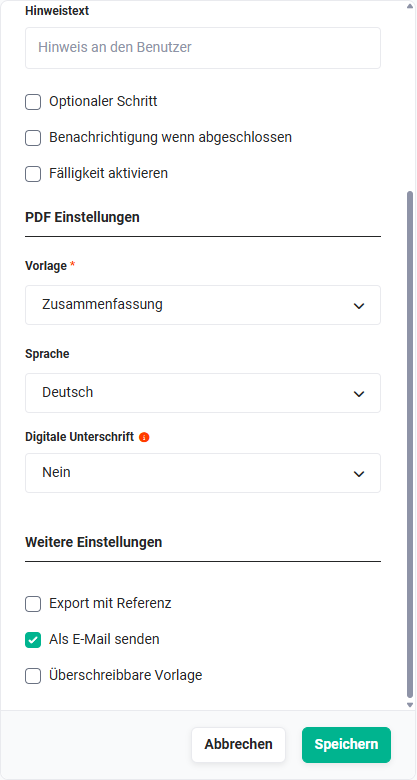 Step type “Generate PDF” with template, language, digital signature and further settings
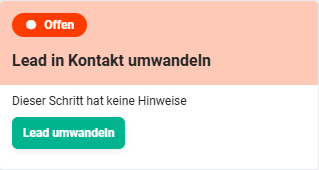 Step “Convert lead into contact” with the “Convert lead” button
2. Frequently asked questions
Why can't I create a process?
Processes are always created in a group. A group must be created first.
Why is a new process not displayed in the record?
New processes are initially inactive and must be activated via the Process active toggle. In addition, processes are only automatically shown to users of the assigned role; users of superordinate roles can select them in the Switch process window.