
Connect - Telephony
Package: SALES
1. General
The Connect setting in Company Information is used to activate the available telephony providers for the respective client. After activating a provider, all users can set up their individual telephony integration under My Settings – Integrations – Connect.
The providers Sipgate (Classic and Neo) and Placetel are supported.
Detailed information about the functionality of the Connect module can be found in the Connect section.
2. Activation and Configuration
After opening the Connect setting in Company Information, the available providers are displayed as tiles in the Providers block.
2.1. Sipgate
A user account at Sipgate and Sipgate.io is required for use.
Both Sipgate Classic and Sipgate Neo are supported. The connection is made via the same connector – the system automatically detects whether it is a Classic or Neo account based on the available services. No manual selection is required during authentication. With Sipgate Neo, the Sipgate Desktop App can be used as a device for calls; the selection is made per user under My Settings – Integrations – Connect.
After clicking the Sipgate tile, a confirmation popup appears with the question "Should the telephony provider "Sipgate" be activated?". After clicking the "Confirm" button, Sipgate is activated for the client and the popup "Configuration Sipgate" opens, displaying the webhook URLs for incoming and outgoing calls. These URLs must be entered in Sipgate.io as webhooks.
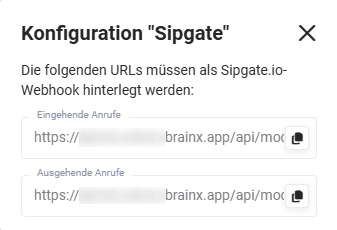 Popup Configuration Sipgate
After activating a provider, the display in the "Providers" block changes: Instead of "Available Providers", "Configured Providers" is now displayed. Tiles for other, not yet activated providers are no longer shown.
The webhook URLs can be viewed again at any time by clicking the tile of the configured provider Sipgate. The popup "Configuration Sipgate" opens again with the webhook URLs.
Every user who wants to use the telephony integration must subsequently set it up individually under My Settings – Integrations – Connect.
2.2. Placetel
After clicking the "Placetel" tile, a confirmation popup appears with the question "Should the telephony provider "Placetel" be activated?". After clicking the "Confirm" button, Placetel is activated for the client.
Every user who wants to use the telephony integration must subsequently set it up individually under My Settings – Integrations – Connect.
2.3. Revoking Authentication
When hovering over the tile of a configured provider, the action icon "X" appears in the tile. After clicking X, a confirmation popup opens with the following message:
"Do you want to disconnect from "ProviderName" now? Existing record links will be retained in case the connection is restored later."
After clicking the "Confirm" button, the authentication is revoked.
3. Video-Tutorials
The following videos are available in German only.