
Product Block in Billing Modules
Package: BASIC
1. General
The blocks "Positions – Basic Settings", "Positions" and "Summary" in the billing modules are also referred to as the "Product Block", as products, services, licences and contingents can be selected here.
The product block offers, among other things, the following features:
- Multilingual fields for the Products and Services modules can be configured in Module Management – Layout.
- Default values for currency, language, base discount and tax setting can be defined for Accounts.
- Individual positions can be marked as "optional".
- A licence can be created directly for product positions, or an existing licence can be selected.
- An existing contingent can be selected for service positions.
- Inserting alternative positions to a position is possible.
- For product bundles, the quantity of the added products can be configured.
- Moving individual positions or entire blocks via drag & drop.
- Option to select which optional or alternative positions should be transferred when converting deals to orders/invoices.
- Custom fields for positions are configurable for Products and Services, including permissions via Profiles.
- A price list can be selected for an Account. When positions are inserted into a product block, prices from the price list stored for the account are loaded preferentially.
- In the Deals module, positions can be inserted directly as optional positions from the selection popup.
The product block is available in the following modules, which are referred to as "billing modules":
- Sales Orders
- Deals
- Incoming Invoices
- Purchase Orders
- Credits
- Delivery Notes
- Invoices
- Cancellations (product block only partially usable)
- Contracts (brainX APP only)
General settings for the product block can be made in Global Settings – Basic Setup – Product Block. These include the following items:
- Settings for the formatting of numeric values in product blocks and for dynamic position groups
- Creating and editing revision-proof and optional fields for product and service positions
- Editing properties of position groups (including managing values for position groups and defining default billing intervals per position group)
In the creation view of a new record — here in the Invoices module — the product block appears as follows:
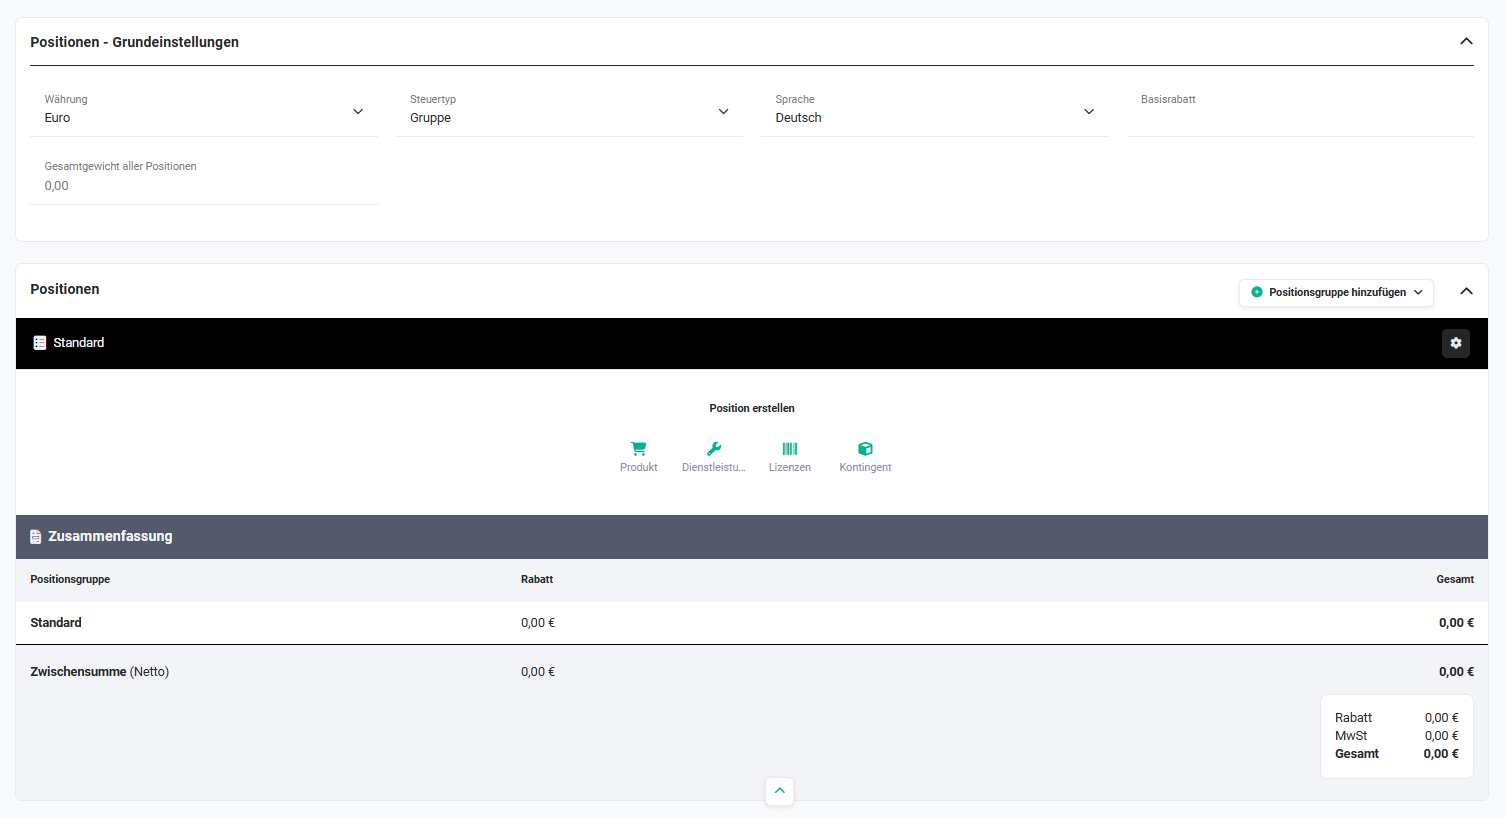 Product Block in the Invoices Module
2. Product Block
The product block is divided into the following sections:
2.1. Block Positions – Basic Settings
The "Positions – Basic Settings" block contains the following fields:
The information for these fields can be stored in the record of an Account in the fields of the same name.
If — for example in a deal or an invoice — an account is selected, this information is automatically transferred.
After selecting the account, a popup is displayed in which you can choose which settings should be transferred.
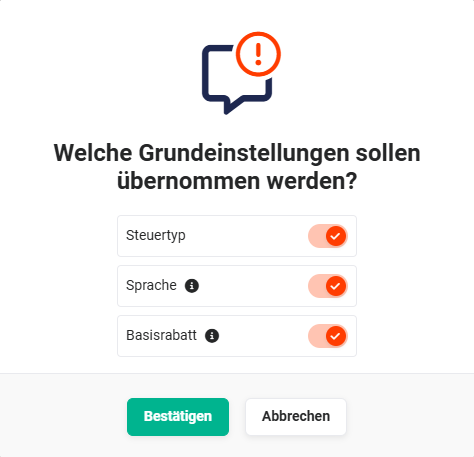 Popup Basic Settings
2.1.1. Currency
The Currency field is a selection list field in which all active currencies can be selected that are configured in Global Settings – Basic Setup – Currencies & Taxes – Currencies with the status "active".
2.1.2. Tax Type
The following selection list values are available by default:
- None → No VAT
- Group → VAT is listed as a group tax after the subtotal
- Individual → VAT is listed per position
The tax type "None" can be used, for example, when an invoice is issued to customers outside Germany.
Further information on the tax type: Global Settings – Basic Setup – Currencies & Taxes – Tax Rates.
2.1.3. Language
The Language field is a selection list field in which a language can be selected.
The following languages are available:
- -none-
- Deutsch
- English
- Francais
- Italian
- Spanish
2.1.4. Base Discount
By default, no discount fields are displayed for positions. These are only automatically shown when the selected account has a positive value in the "Base Discount" field. In this case, the discount fields are displayed for every new position and automatically calculated when the product/service is selected.
If no base discount is set for an account, a percentage or direct discount can be entered in the product block for each position.
After clicking the three-dot action icon, a flyout menu opens containing the Percentage Discount and Direct Discount actions.
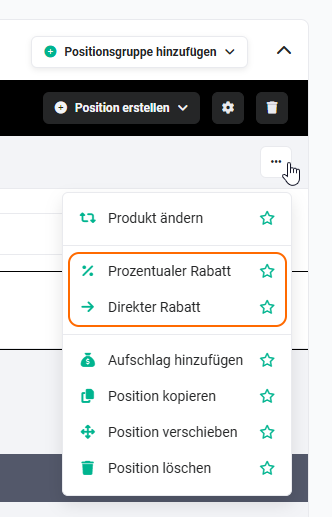 Discount Actions
After clicking one of these actions, the Percentage Discount or Direct Discount input field is shown in the position.
2.2. Block Positions
In the Positions block, positions are added in the creation view of a record and assigned to a specific position group if required. Positions and position groups can also be sorted/moved.
The display, selection and editing of quantities, list prices, VAT (only with tax type "individual") and prices is also located in the position group.
A "position" in the product block is a product, a service, a licence or a contingent.
Which modules are available here depends on which brainX packages have been booked:
- Product → Base package
- Service → Base package
- Licences → Sales and Billing package
- Contingent → Service and Projects package
The "Positions" block appears as follows in the creation view of a new record:
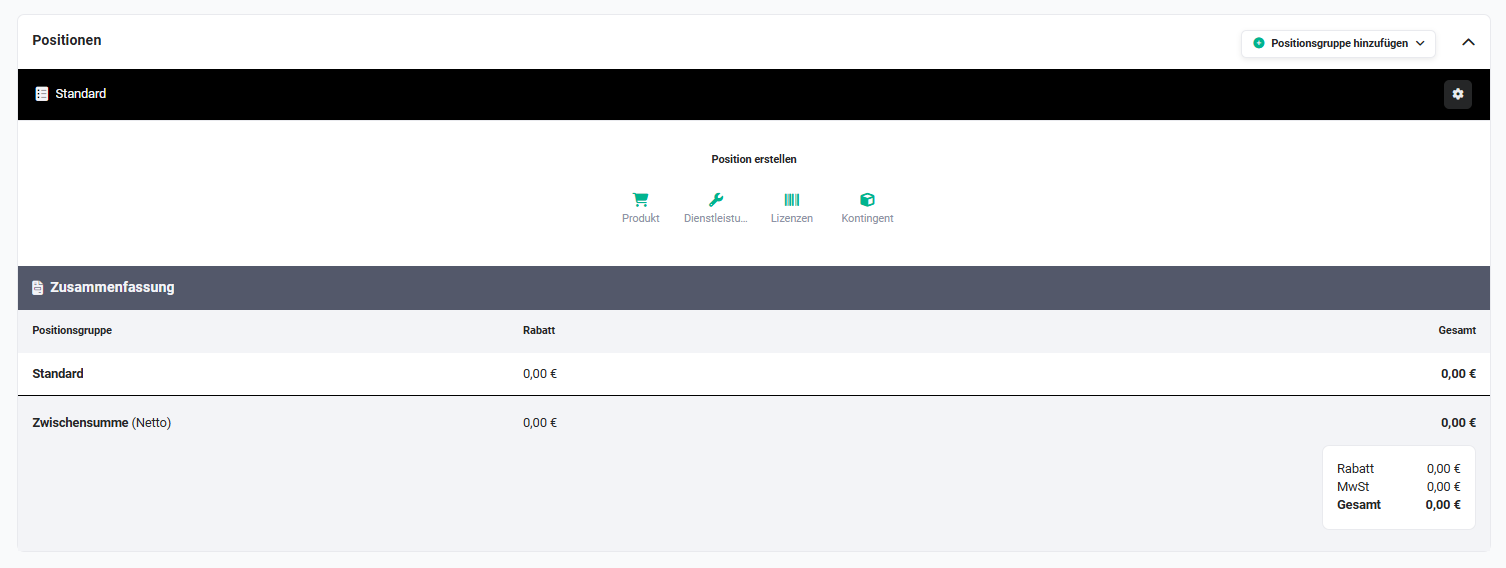 Product Block – Positions Block
In the "Create Position" area, records from the respective modules can be inserted as positions into a position group using the Product, Service, Licences or Contingent buttons.
After clicking a button, a popup opens in which a record from the corresponding module can be selected.
A licence can only be selected if an account has already been selected.
2.2.1. Position Group Actions
The following actions are available within the position group:
- Add Position Group
- Position Group Actions and Settings
- Move Blocks and Positions
- Select Position Group
- Create Position
- Delete Group
- Assigned Position
- Create Contingent from Service
- Change Position
- Change Discount
- Add Surcharge
- Copy Position
- Delete Position
- Position Description Editor
- Select Price List
- Insert Page Break after Position
- Insert Page Break after Subtotal
- Add Actions to Favourites
- Scheduled Actions for Positions
- Allow Automatic Price Increase
- Alternative Billing
- Create Licence from Product
- Select Licence
- Select Contingent
All changes to positions in product blocks are shown in Change Tracking.
2.2.1.1. Add Position Group
Within a position group, positions can be grouped thematically for example. The "Standard" position group is always present by default.
After clicking the Add Position Group button, a flyout menu of available position groups is displayed.
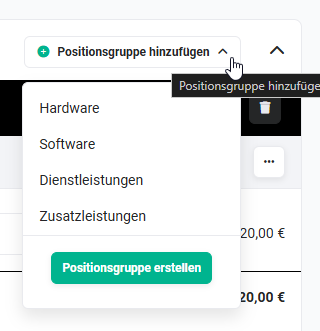 Button "Add Position Group"
Position groups are configured in Global Settings – Module Management – Layout per module. Position groups can be created, sorted or modified here.
If the option "Allow creation of new values" has been activated in the field properties of the "Position Group" field, new groups can also be created directly when selecting a position group.
2.2.1.2. Position Group Actions and Settings
Each position group has an action icon (gear icon) for position group actions and settings.
After clicking the action icon, a flyout menu with actions opens:
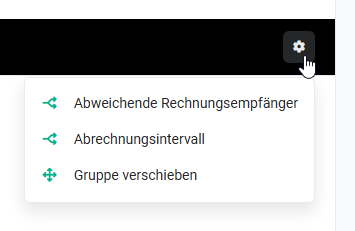 Flyout Menu Actions
Action Alternative Invoice Recipients
After clicking the Alternative Invoice Recipients action, the Invoice Recipients popup opens:
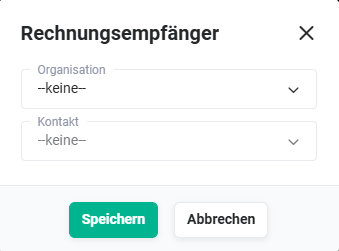
In the popup, alternative invoice recipients can be selected from the Accounts and Contacts modules.
Action Billing Interval
After clicking the Billing Interval action, a selection list of available billing intervals is shown in the position group header:
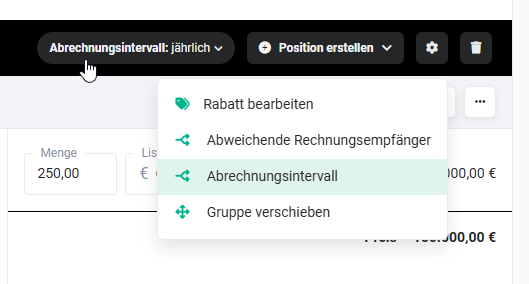 Billing Interval Selection List
Action Move Group
After clicking the Move Group action, the Sort Position Groups popup opens, in which position groups can be re-sorted using drag & drop:
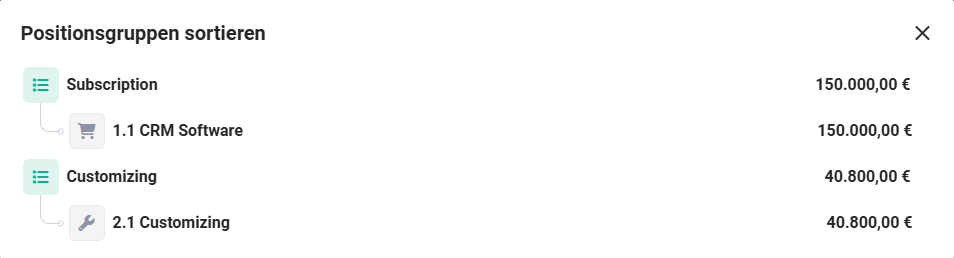 Popup Sort Position Groups
Action Edit Discount
If the position group already contains positions, the Edit Discount action is additionally shown — depending on the positions:
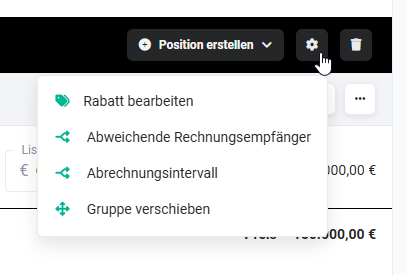 Flyout Menu with Edit Discount Action
After clicking the Edit Discount action, the Discount popup opens:
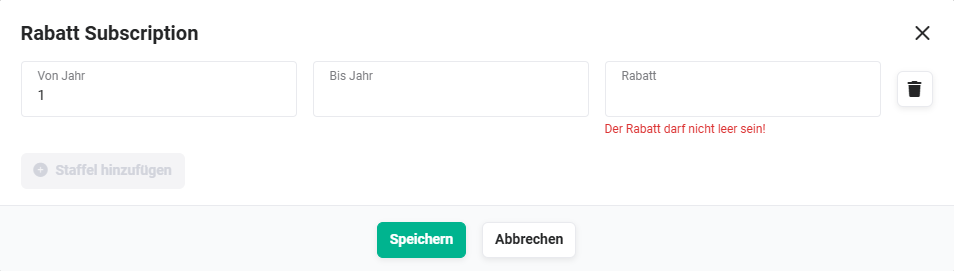 Popup Discount
In the popup, discount tiers can be stored for the position. Once a first discount tier has been entered, the Add Tier button becomes active and additional discount tiers can be entered.
2.2.1.3. Move Blocks and Positions
Using the Move Group and Move Position actions, both position groups and individual positions can be re-sorted afterwards.
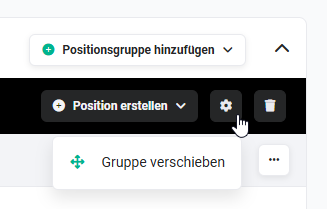 Action "Move Group"
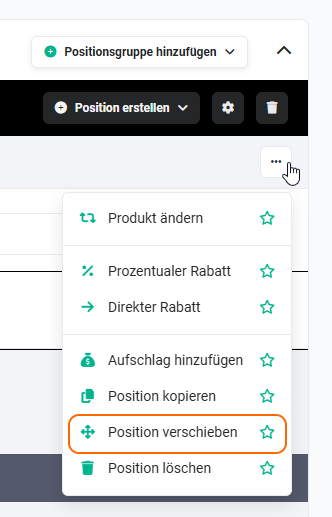 Action "Move Position"
After clicking the Move Group or Move Position action, the Sort Position Groups popup opens, in which both the position groups and the positions themselves can be re-arranged using drag & drop.
In the popup, the current status of each position is shown — where available — to provide a better overview of the state of individual positions while moving.
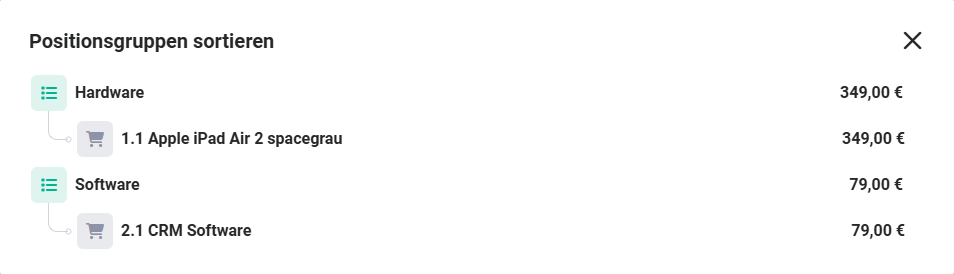 Popup "Sort Position Groups"
2.2.1.4. Select Position Group
Already selected position groups can be changed afterwards by clicking on the position name.
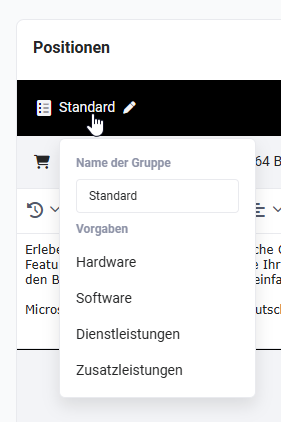 Product Block – Select Position Group
Clicking on the name of an existing position group in the Defaults area changes the group.
The position group name can be changed directly to a new value in the input field. After the change and pressing Enter, the name is applied.
Positions already in the position groups are retained.
2.2.1.5. Create Position
New positions (Product, Service, Licences or Contingent) are selected using the Create Position button.
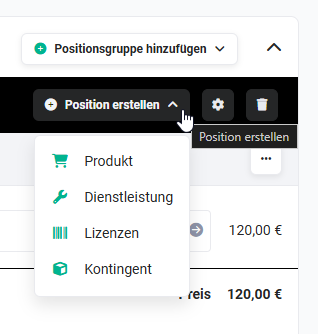 Button "Create Position"
After clicking the Create Position action button, a flyout menu of available modules is displayed.
After selecting — i.e. clicking on — a module, a popup opens in which a product/service/licence/contingent can be selected by clicking on it.
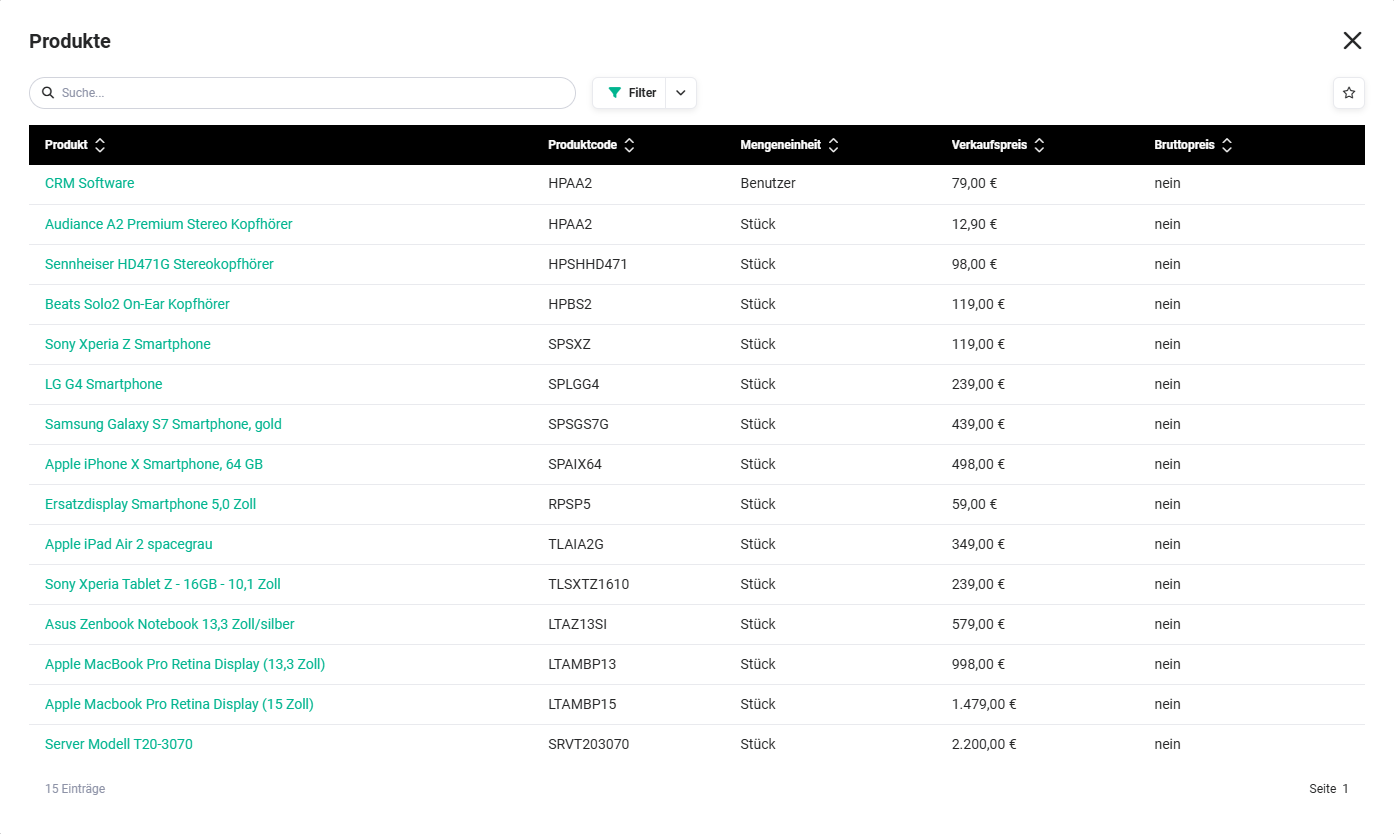 Popup "Products"
A search field is available in the popup. After entering a search term and pressing Enter, the search is executed and the results are shown in the popup. When entering a single character, only matches whose words begin with that character are shown. When entering two or more characters, matches that contain the entered string anywhere are also shown.
Filtering by Price Type with a Billing Interval Set
If a billing interval is set for a position group (see section 2.2.1.2.), a filter on the matching price type is automatically applied in the selection popup. The products shown are thus restricted to those whose price type matches the selected interval.
The filter can be removed manually in the popup to also show products with a different price type.
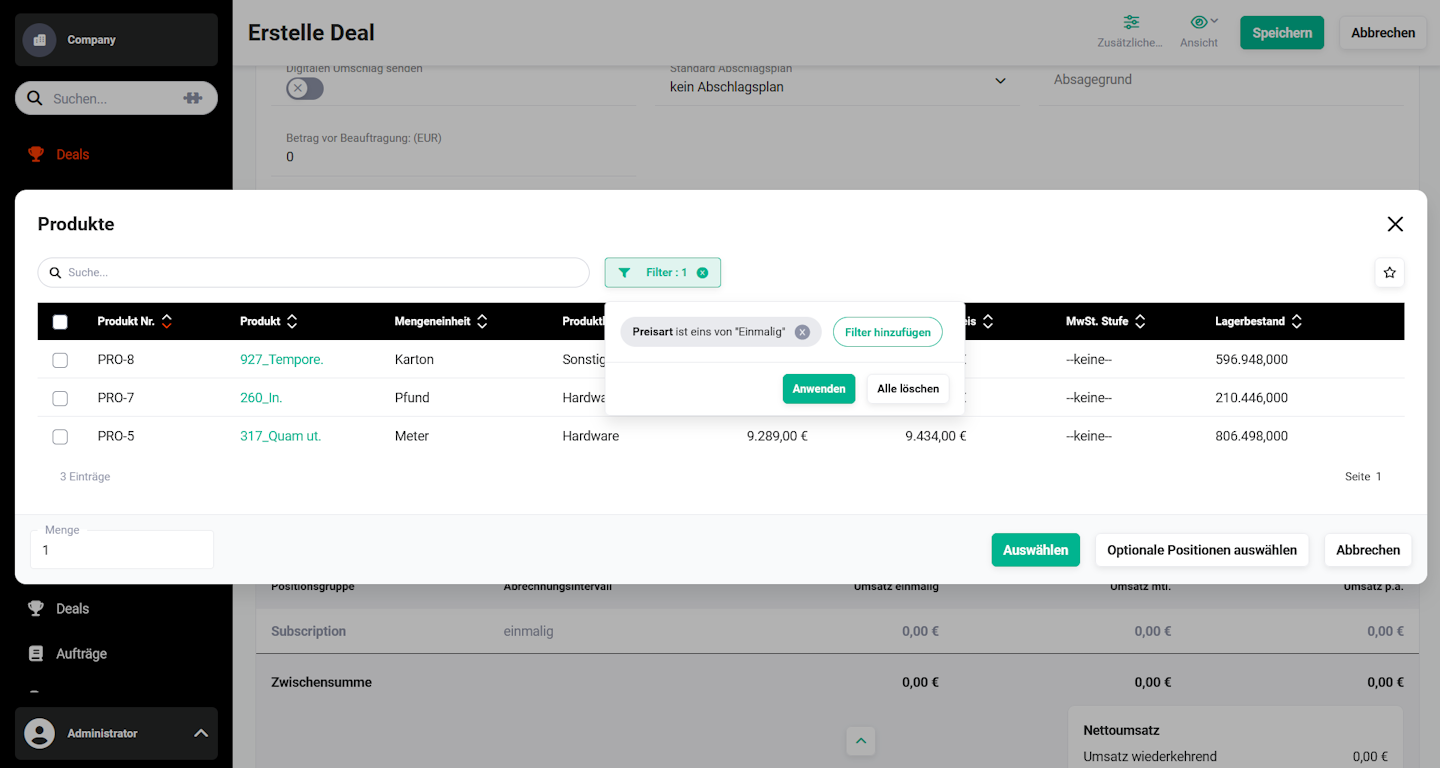 Popup Select Products – Price Type Filter
If such a product is selected, a warning appears: "The price type of the selected position(s) differs from the block. Please select again or change the billing interval."
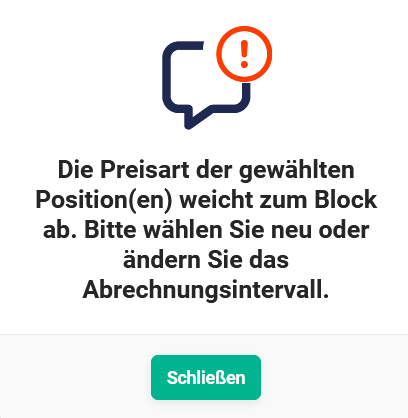 Popup Warning Differing Price Type
In this case, either a product with a matching price type must be selected, or the billing interval of the position group must be adjusted accordingly.
2.2.1.6. Delete Group
Position groups — including the positions they contain — can be removed using the Delete Group action button.
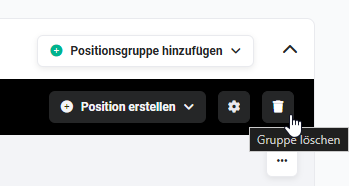 Action Button "Delete Group"
2.2.1.7. Assigned Position
Clicking on a position shows a direct link to it in a flyout menu.
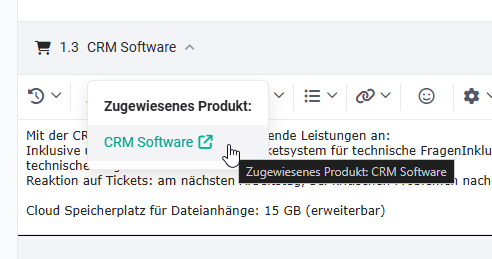 Position – Assigned Product
If a yellow warning icon (exclamation mark icon) is displayed on the right side of a position, this means that parts of the position differ from the referenced product. To check the position, the edit mode of the record must be opened.
2.2.1.8. Create Contingent from Service
The Create Contingent from Service action is only shown when the position is a service.
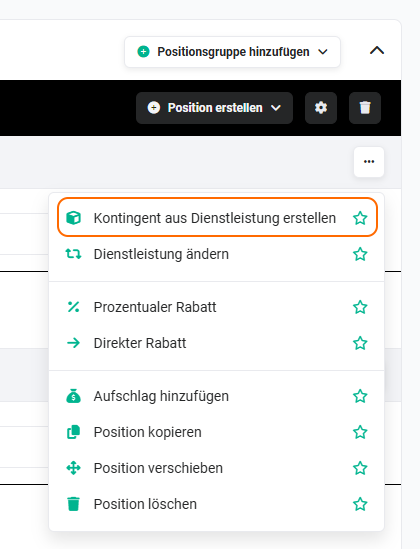 Action "Create Contingent from Service"
After clicking the Create Contingent from Service action, the Create Contingent popup opens, in which a new record for the Contingents module can be created.
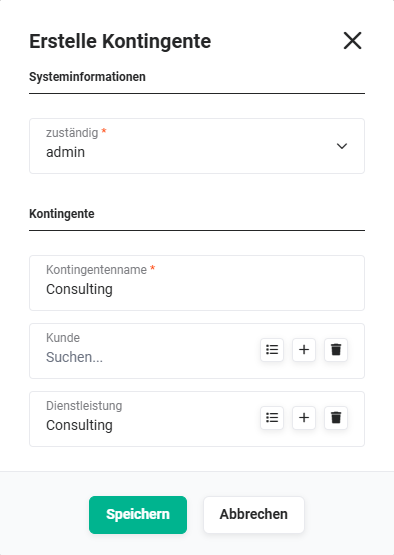 Popup "Create Contingent"
The Select Contingent action allows an existing contingent to be linked to the service position — see Select Contingent.
2.2.1.9. Change Position
Positions can also be changed directly using the Change Position action — without deleting them first.
Depending on whether the position is a product/service/licence/contingent, the action is named accordingly.
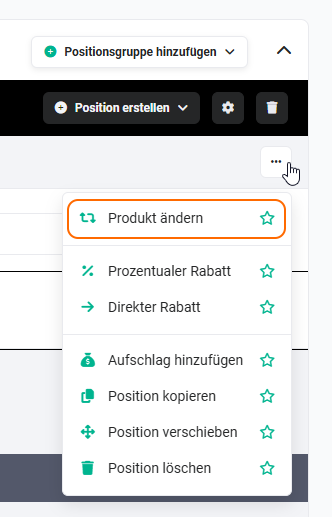 Action "Change Product"
After clicking the Change Position action — as with the Add Position action — a popup for selecting a new position is displayed.
If a position from the respective module (Product, Service, Licence or Contingent) has been deleted, a corresponding notice is shown at the position:
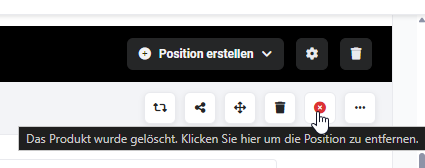 Notice Position Deleted
By clicking the X action icon, the position is removed.
2.2.1.10. Change Discount
After clicking the three-dot action icon, a flyout menu opens containing the Percentage Discount and Direct Discount actions.
Discount Actions
After selecting Percentage Discount or Direct Discount, an input field for entering the discount is shown.
2.2.1.11. Add Surcharge
After clicking the three-dot action icon, a flyout menu opens containing the Add Surcharge action.
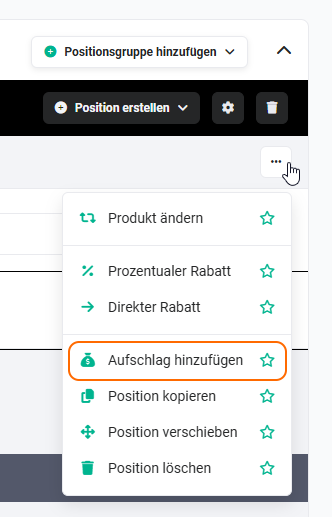 Action "Add Surcharge"
After clicking the Add Surcharge action, an input field for entering a percentage surcharge is added.
2.2.1.12. Copy Position
After clicking the three-dot action icon, a flyout menu opens containing the Copy Position action.
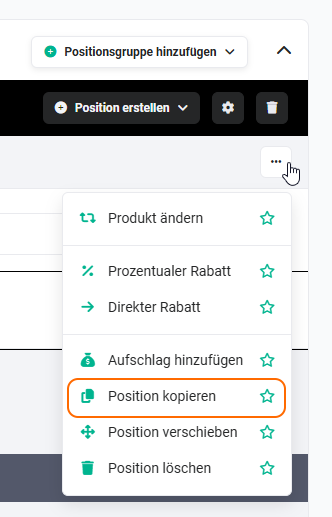 Action "Copy Position"
After clicking the Copy Position action button, the position is copied and inserted directly below the respective position.
2.2.1.13. Delete Position
After clicking the three-dot action icon, a flyout menu opens containing the Delete Position action.
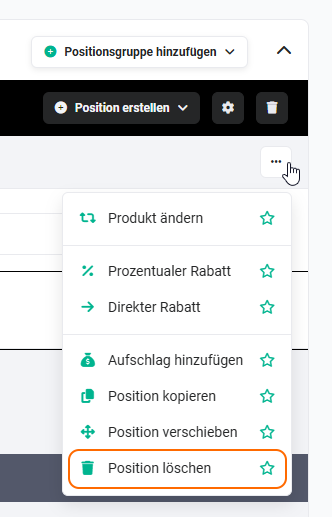 Action "Delete Position"
After clicking the Delete Position action button, the position is removed.
2.2.1.14. Position Description Editor
The position description editor offers the following text formatting options:
- Font type/size
- Font/highlight colour
- Text formatting (bold, italic, strikethrough and underline)
- Superscript/subscript
- Alignment
- Lists
- Links
- Further options
2.2.1.15. Select Price List
In the List Price field, the Select Price List action icon (right-arrow icon) is located. After clicking it, the Price Lists popup opens for selecting a price list.
If a product/service is included in one or more price lists, the corresponding price list can be selected in the popup. After selecting, the list price stored in the price list is loaded.
2.2.1.16. Insert Page Break after Position
By clicking Insert Page Break after Position, a page break is inserted at this point when generating a PDF file (see Templates module) and a new page begins. By clicking the icon again, the inserted page break after the position is removed.
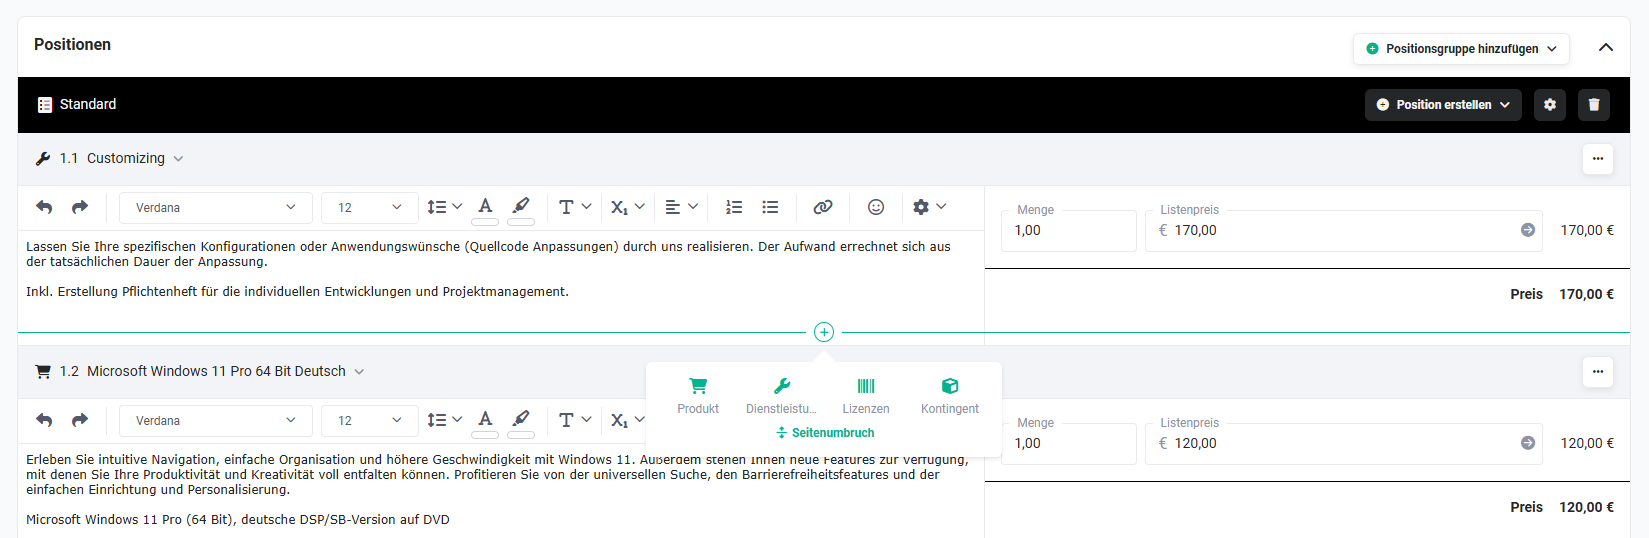 Insert Page Break after Position
2.2.1.17. Insert Page Break after Subtotal
By clicking Insert Page Break after Subtotal, a page break is inserted at this point when generating a PDF file (see Templates module) and a new page begins. By clicking the icon again, the inserted page break after the position is removed.
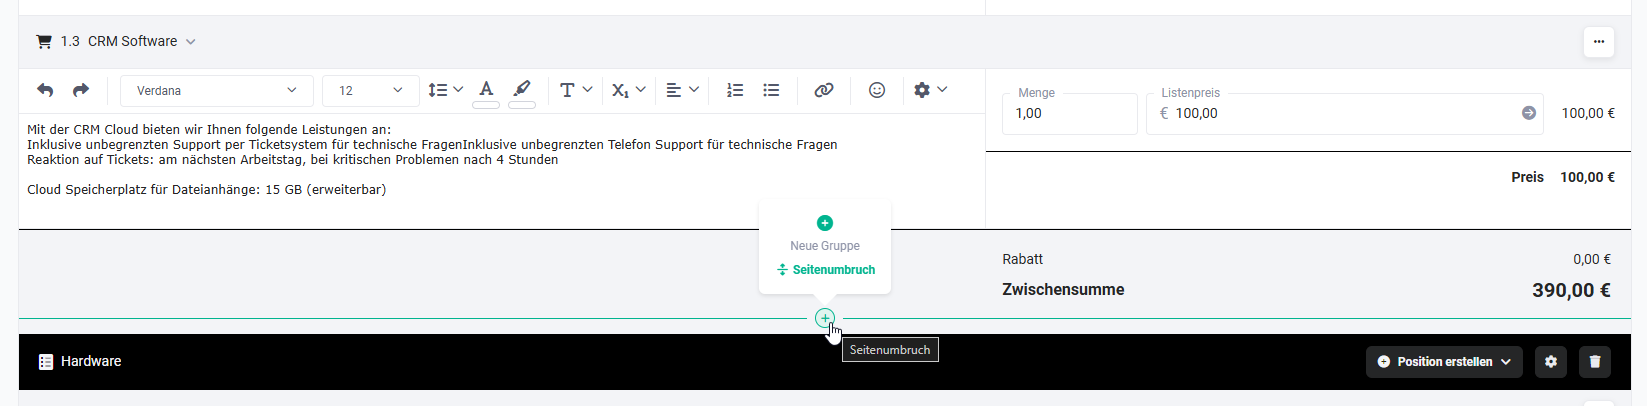 Insert Page Break after Subtotal
2.2.1.18. Add Actions to Favourites
In the flyout menu of a position's actions (three-dot icon), all actions available for that position are displayed.
Using the Add to Favourites action icon (star icon), an action can be added to favourites. Favourites are displayed in the position to the left of the three-dot action icon as separate action icons.
The state of the star icon indicates the favourite status of the respective action:
- Empty star: The action is not set as a favourite and can be added to favourites by clicking.
- Filled star: The action is already set as a favourite and can be removed from favourites by clicking again.
Favourited actions in the product block are additionally described with text and have a customised active state: a selected action (e.g. a percentage discount) is highlighted in green. Any number of favourited actions can be selected; if required, you can scroll horizontally.
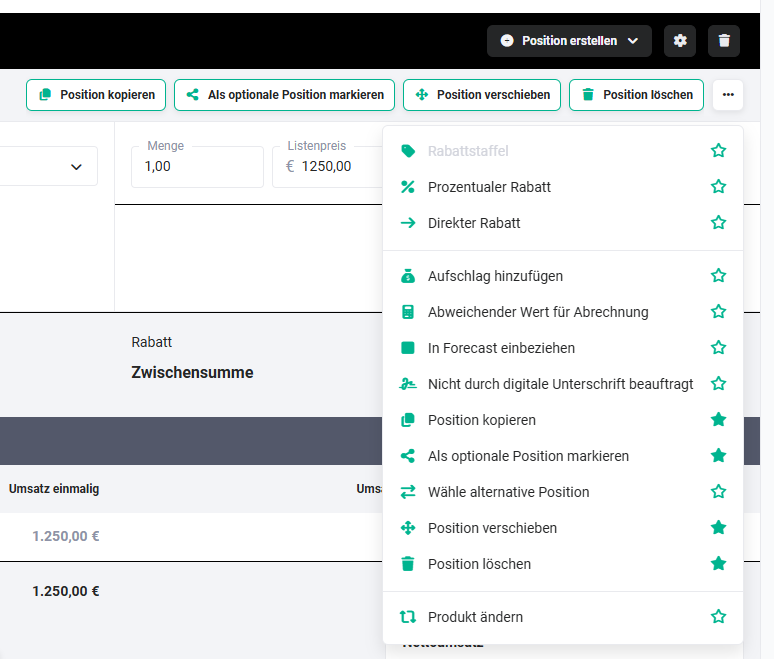 Flyout Menu Actions – Favourites
2.2.1.19. Scheduled Actions for Positions
If scheduled actions for a position are present in an Automation, these are displayed in the edit mode of the record in the positions (lightning bolt with letter A icon).
On mouseover over this icon, the tooltip "Show scheduled actions for this position" is displayed.
After clicking the icon, a small popup is shown displaying the scheduled changes.
2.2.1.20. Allow Automatic Price Increase
After clicking the three-dot action icon, a flyout menu opens containing the Allow Automatic Price Increase action.
By activating this action, automatic price increases — e.g. for defined price increases — are permitted to be applied to the respective position in the contract.
This action is exclusively available in the Contracts module!
2.2.1.21. Alternative Billing
After clicking the three-dot action icon, a flyout menu opens containing the Alternative Billing action.
After clicking the Alternative Billing action, the fields "Billing from" and "Billing until" are added to the position. Using these fields, a billing period that differs from the contract can be defined for the respective position — for example if a position should only be billed from a certain date or for a limited period.
This action is exclusively available in the Contracts module!
2.2.1.22. Create Licence from Product
The Create Licence from Product action is only shown when the position is a product.
After clicking the three-dot action icon, a flyout menu opens with the Create Licence from Product action. After clicking the action, the Create Licence popup opens, in which a new record for the Licences module can be created.
2.2.1.23. Select Licence
The Select Licence action is only shown when the position is a product.
After clicking the three-dot action icon, a flyout menu opens with the Select Licence action. After clicking the action, a popup opens for selecting an existing licence to be linked to the product position.
2.2.1.24. Select Contingent
The Select Contingent action is only shown when the position is a service.
After clicking the three-dot action icon, a flyout menu opens with the Select Contingent action. After clicking the action, a popup opens for selecting an existing contingent to be linked to the service position.
2.3. Block Summary
The "Summary" block displays the position groups, the discount totals of the position groups, the total net amounts of the position groups, the subtotal(s), the VAT amount and the total amount.
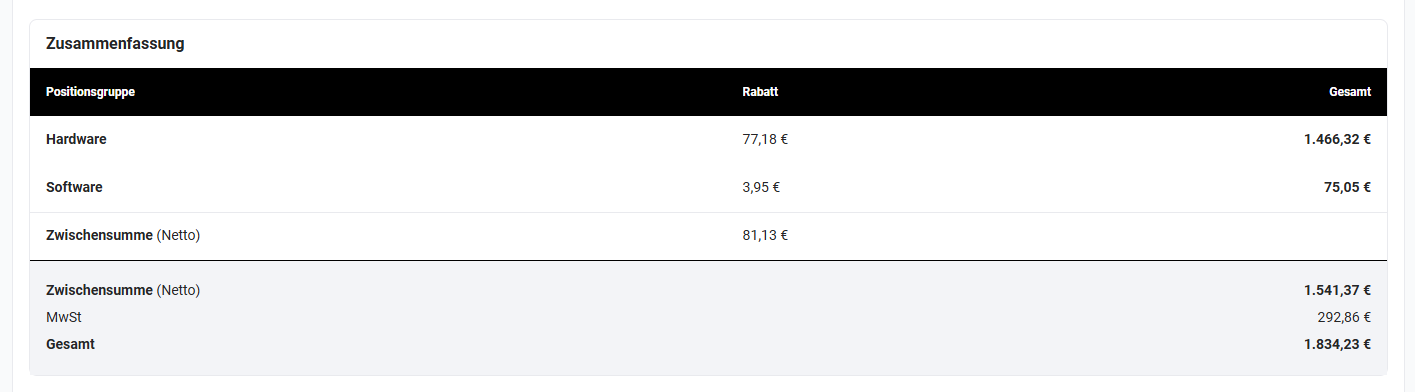 Product Block – "Summary" Block